
Ever noticed that the colours you print sometimes look a little different to the colours on your computer screen?
That’s because the spectrum of colours used in CMYK artwork design you see on your screen is a lot bigger than what can be printed on most printers, including the ones we use and the one you might have in your office.
Here, we’ll discuss why there are different colour spectrums for print and screens, setting up colours for your printing and some quick colour dos and don’ts!
Colour differences: RGB vs CMYK artwork design
RGB
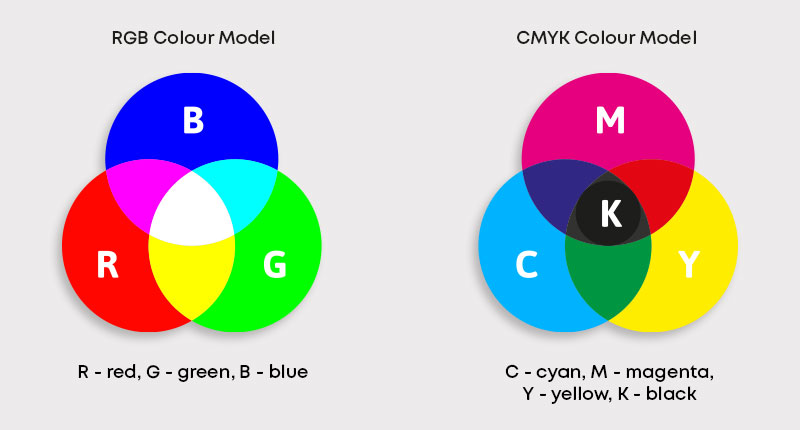
RGB (red, green, blue) colours are the ones you see on your computer monitor and on other digital screens.
For these CMYK artwork design colours, you add various amounts of red, green, or blue to a black canvas to get different colours and, when these three colours are added in equal intensity, they make white.
This means you can make lots of bright and neon colours with this colour mode that don’t really translate well to print but look fantastic on a screen!
CMYK
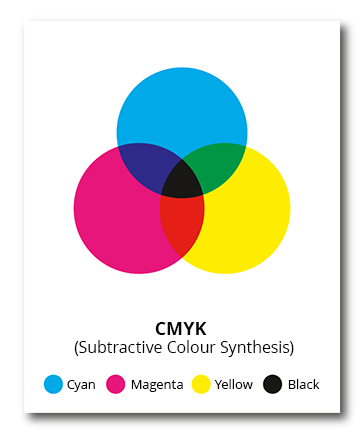
CMYK colours are made from cyan, magenta, yellow and black (key). They are subtractive – this means that the starting canvas is white and, as colours are added, it gets darker and darker until it’s black.
Print uses the CYMK colour mode because we start with a white background (like paper) and add colours to it until it gets darker.
Because we can’t add white, this can mean CMYK colours aren’t as bright as RGB colours, which is why the colours you print often look a little duller than they do on your screen.
Do I need to change my CMYK artwork design ?
When you upload your artwork to our online proofing tool, your colours will automatically be converted to CMYK, so it’s up to you whether or not you want to create artwork in this colour mode.
The benefit of setting up your colours for printing in CMYK is that you’ll be designing with exactly the colours you’ll be printing with, so you’ll know what your artwork is going to look like at the end from the get-go.
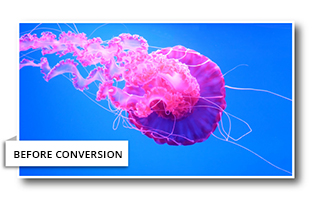
If you don’t change your colours, that’s not a problem – you’ll be able to review and approve the colours once our proofing tool has been busy converting them. Here’s an example of files that have been automatically converted from RGB to CMYK before going to print.

Why do print files need to be CMYK?
The RGB colour spectrum is huge – much larger than the CMYK spectrum. This means that some colours, like fluorescent orange and green, aren’t available within the CMYK spectrum. Commercial printing presses, like ours, print onto white paper and we add colours until the canvas is darker.
Printing in black and CMYK
Technically, if you added cyan, magenta, and yellow together in equal and large amounts, it would create black. However, due to impurities of the ink, true black is hard to recreate – that’s why printers include a black ink (K) along with the other colours.
If you want to use black in your design, we recommend using the CMYK values of (30, 30, 30, 100) as we’ve found this to be the most effective when printing.
Creating CMYK artwork design files in CMYK
The easiest way to design artwork for print is to set up and design the whole document in CMYK colour. This will save any problems trying to adjust colours afterwards, which can be quite difficult.
Exceptions
Not all software can create files in CMYK colour (such as Microsoft Word and PowerPoint). If you send us a Word or PowerPoint document, for example, we’ll convert it from RGB to CMYK colour and then send a proof back to you, which is an image showing how your design will look when set up for print. Below you’ll find my guides for Adobe Photoshop, Adobe InDesign, Adobe Illustrator and Microsoft Publisher.
- Adobe PhotoshopYou’ll set your colour settings in Photoshop when the document is first created. Look at the first image below to see the right settings for CMYK.
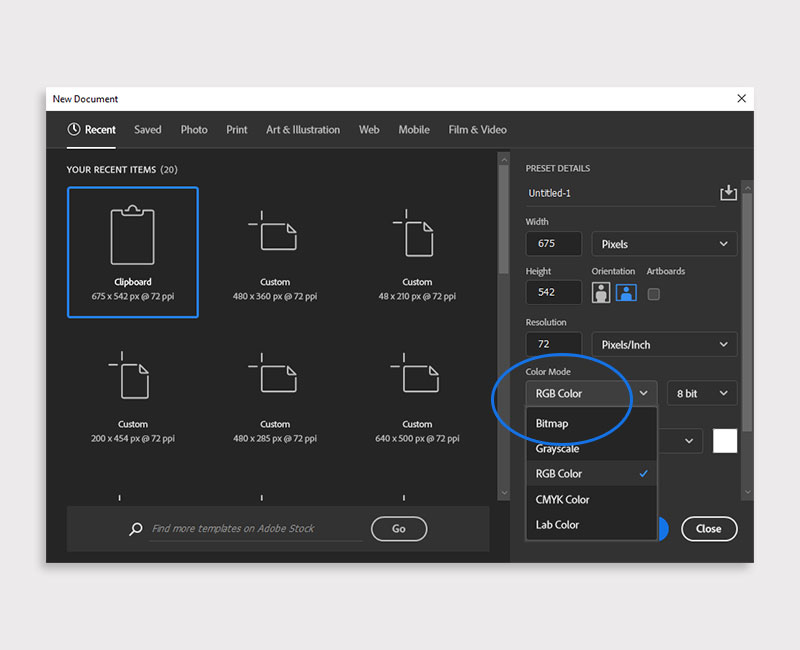 You can also check the settings when the document is open by clicking on ‘Image’ at the top of your screen and then ‘Mode’.
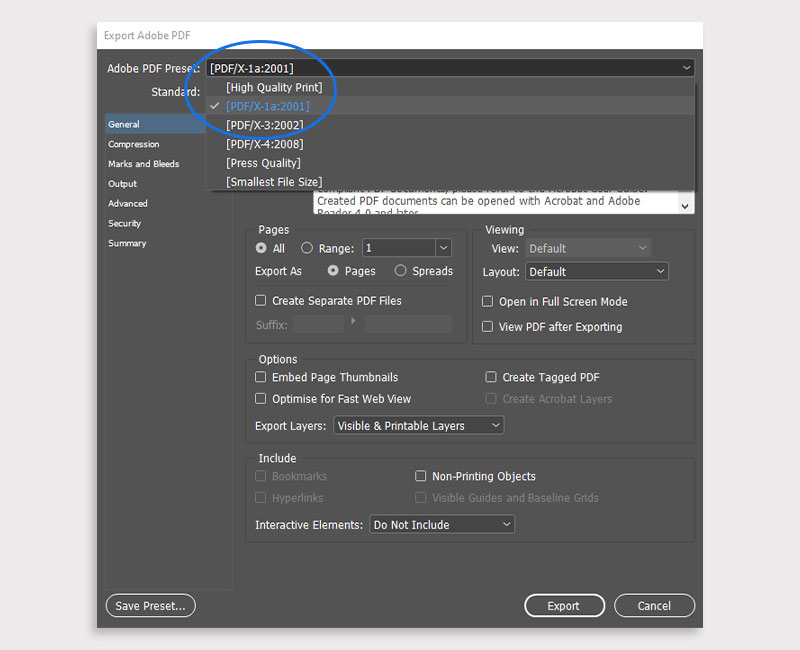
 - Adobe InDesignWhen you’re working with InDesign, the colours will be automatically converted to CMYK when the file is exported to PDF by selecting the option: PDF/X-1a:2001.
- Adobe IllustratorLike Photoshop, you can set up the colours for your printing when you first create a document in Adobe Illustrator. If you want to convert the colours in an existing file:
• Open it up in Illustrator
• Click File > Document Colour Mode > CMYK Color
• Click the selection tool and drag it over the entire image.
• Click Edit > Edit Colors > Convert to CMYK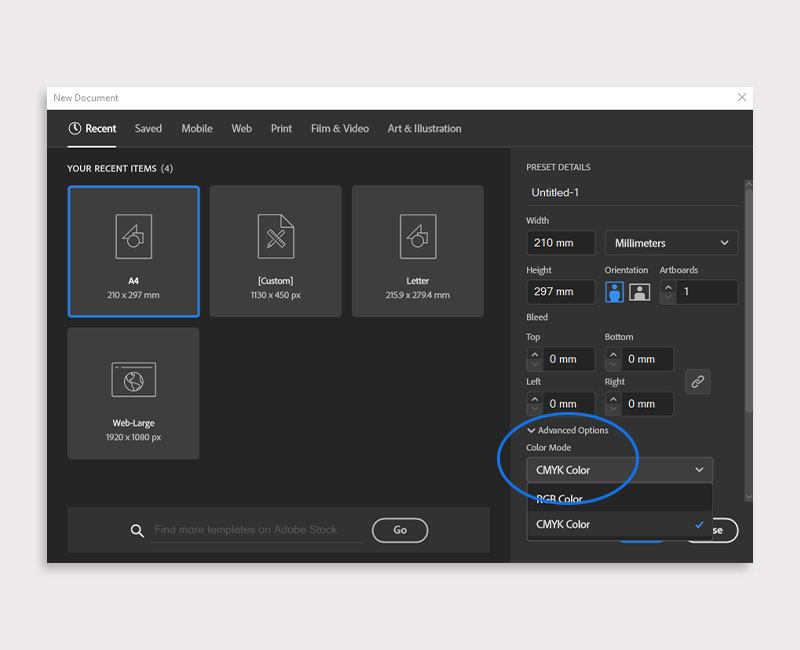
- Microsoft PublisherTo convert your colour settings in Microsoft Publisher (any edition from 2003 to 2013; for the 2016 version there is no way to change the colour setting), begin by opening up your document.
 • Click File > Info > Commercial Print Settings
• Here you’ll find an option called ‘Choose Colour Model’ – select CMYK - Other SoftwareIf you’re using any other kind of software, your key settings to make sure you’ve got set up are:
• Colour Mode: CYMK (sometimes called Process Colours)
• Colour profile: Fogra39 (ISO 12647-2:2004)
• Where possible export as: PDF/X-1a:2001
Converting CMYK artwork design files to CMYK and re-balancing colour
If you’re using software like Photoshop, you can choose to convert RGB to CMYK colours and then re-adjust the colour balance afterwards. If you’re using RGB elements, it’s worth converting these into CMYK and rebalancing the colours during the design process.
Setting up colours for printing: dos and don’ts
Here are some quick tips to help with checking that your colours are all set up right:
- Print off some CMYK colour swatches to use to check your colours if you’re not sure how they’ll look when printed.
- If you can, check your proofs on a screen using a colour calibrated monitor – uncalibrated screen colours can vary between monitors.
- Don’t check colours against samples you’ve printed off of your desktop printer – they normally try to emulate RGB colours rather than printing the true CMYK colours so might not be accurate.

Colour gamut differences in CMYK artwork design
With RGB, colours are created from Red, Green and Blue. CMYK uses Cyan, Magenta, Yellow and Key (black).
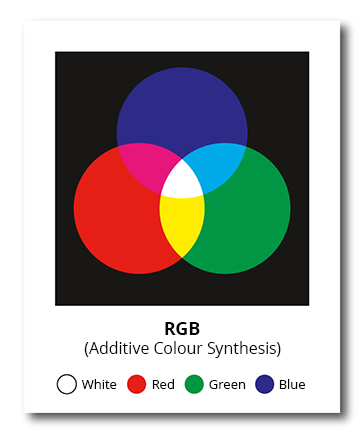
RGB is described as ‘additive’. With no light as a starting point, RGB adds light from the three primary colours, Red, Green and Blue to create the desired colour. When all three colours of light are combined, white is achieved. The RGB system is used by devices that create colours by combining light sources, such as TV screens, computer monitors and projectors. For this reason, it’s NOT an appropriate approach to colour synthesis for print.
CMYK is described as ‘subtractive’. The background starts out as white, which reflects all the colours of the spectrum. As colours are added, the wavelengths of light that can be reflected are limited. Hence CMYK can be said to ‘subtract’ unwanted wavelengths of light in order to achieve the required colour. CMYK is used when creating colours by mixing inks or dyes, making it the preferred system of colour synthesis for print.
Why print in CMYK?
Commercial print presses achieve colours by combining inks. They tend to use cyan, magenta, yellow and black inks to produce colours on a white background. It makes sense then that CMYK files are used to prepare artwork for print.
RGB picture files are ideal for devices that reproduce coloured images via a light source such as electronic screens and projectors. However, they’re not set up to tell a printer how to reproduce those colours with inks.
That’s why all RGB files that are presented for print end up getting converted to CMYK. However, because RGB covers a broader gamut of colours than CMYK, some shades will be compromised during conversion. This is particularly true for vivid oranges and greens.


It’s better to create images in CMYK from the outset, or convert any RGB files to CMYK yourself if you want to have a more accurate idea of how your design will appear on print.
Converting RGB to CMYK
Using software like Adobe Photoshop, it’s possible to readjust the colours after converting your RGB file so that your CMYK image more closely resembles the original.

Adobe InDesign
When using InDesign, we recommend using preset “pdf/x-1a:2001” as you export your document to a PDF in order to preserve a good colour match.
Adobe Illustrator
In Illustrator, the colour mode is set when the document is created. Again, we recommend using preset “pdf/x-1a:2001” as you export your document to PDF.
If you’ve created your project using an alternative program, key settings are often called “colour mode CMYK” or “process colours” so select these settings for a more accurate colour representation.